Unit 4
Monster
Plan:
1. Create a cylinder shape for the body + carve out inside of cylinder
2. Create a sphere for head + carve out inside + attach to body
3. Let body and head dry so its stronger/won't fall
4. Attach teeth and other details (soccer and baseball, thing on head, etc...)
5. After first firing, glaze piece according to drawing


Reflection:
I am happy with how this piece came out. I like the bright colors. Turning my third-grader's drawing into a doable sculpture was challenging, but I think I brought it to life, I hope he'll be happy with it too! The other hard part was getting it to stay up. I had to wait while it dried, using sponges to hold it up in the position I wanted it to be in. It cracked during the first firing and I tried to fill it with glaze before firing again. You can still see the crack, but it didnt break all the way so I'm glad!
Alebrije #1


Plan:
1. Create pinch pot for head and sculpt
2. Sculpt body
3. Fire in kiln
4. Glaze
(Did not finish glazing because I made a different alebrije)
Reflection:
I liked how this was turning out, but I couldnt use it for my alebrije since its not a full-body piece. Im glad I made a different alebrije though, because I like the second one better! Since I didnt fully finish this one, I dont have much to say about it. I like how the glazing was turning out, as well as the colors I used! When I have time, this will be fun to finish.
Alebrije #2


Plan:
1. Create body out of pinch pot
2. Attach wings, head, and tail
3. Let wings dry in place wile supporting them with sponges
4. Once wings are dry, add details
5. Fire in kiln
6. Glaze (oops)
Reflection:
Compared to the first alebrije, I like this one much better! I didn't know that we weren't supposed to glaze the alebrije, so its fully glazed, but I plan on sanding and painting it with acrylic on top of the glaze! I wasnt that happy with the glaze anyways (it wasnt thick enough) so this works out for the better! I'm sure I'll enjoy the final piece!
Lidded box

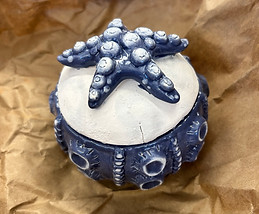
Plan:
1. Create pinch pot
2. Cut where I want the lid to be
3. Add barnacles and sea star
4. Fire in kiln
5. Glaze